A Guide to Common Trail Camera Features and Tips for Getting Better Pictures
Just like digital cameras, trail cameras are now also available in a variety of models, specifications and at different prices. With so many choices available, it gets hard to choose the best one. This guide about trail camera features will help you choose the best option.
Trail Camera Features:
Ability to detect animals
The majority of trail cameras use PIRs that can detect average changes in the thermal landscape. Temperature changes occur as soon as something moves that has a different temperature to its background. PIRs can easily detect a warmer object moving in front of a cooler background and vice versa. Additionally, a big animal moving far away can be detected as easily as a small animal moving near the camera if both the animals have the same temperature change relative to the background.
Lens
Usually, a trail camera comes with a fixed-focal-length lens. Going for a wide-angle lens is good for getting a lot of things in the picture, but if the subject is individual, then it may appear very small on the image. As far as a narrow field of the view zoom lens is concerned, it can miss quite a lot of details.
Picture/Video Quality
The image quality of a trail camera is outstanding. It has a high megapixel count. The more megapixels, the better picture/video quality. A lot of trail cameras have 5 MP or greater.
Memory Card
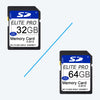
Different settings of your trail camera will fill up your camera’s SD card either fast or slow. Therefore, it is better to invest in the SD card of a trail camera and opt for the one with the largest capacity. However, it is best to check with the manufacturer what capacity of the SD card is suitable for your chosen camera.
Trail cameras are getting better day by day. But no matter how amazing they are, there is no point in owning a trail camera unless and until you know how to make the most out of it. Here are some tips and tricks that will help you:
Hang your trail camera high
Experts recommend placing a trail camera 5 to 7 feet high. Make sure you leave some slack in the mounting strap. After that, place the stick crossways between the tree and camera. This is best when you want to shoot something standing down like an animal.
Know your trail camera before setting it up
Take your time to learn about all the features of your trail camera. Learn to adjust trigger speeds, detect ranges and know flash ranges.
Use better batteries
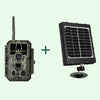
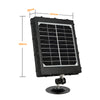
Go for high-quality lithium batteries. They are a bit expensive but last much longer than alkaline batteries. For even better results, opt for auxiliary power. There are a lot of trail cameras that come with an external battery port.
Use high-quality cards
Not all memory cards are of good quality. They all may look the same but some are better than others. High-quality cards don’t fail to save an image and write faster.




Leave a comment